
前書き
普段はWSL2やMacでコードを書いて実行していますが、別端末でサーバー(MySQLデータベース)やコード(Python)を動かしたくなりました。
手元にRaspberry Piがあったため、Ubuntuをインストールし、合わせてMariaDBとPython(Pyenv,Poetry)をインストールしました。
本記事は手順を備忘録としてまとめた内容になります。
注意事項
本記事は2023/07/01時点の情報です。
最新の情報とは異なる場合がありますので参考になる際はご注意ください。
- 前書き
- 注意事項
- 実行環境
- OSイメージの書き込みから起動と設定
- パスワード変更
- Wi-Fi設定
- 各種パッケージインストール
- raspi-configのインストール
- Macネットワーク上でファイル共有する
- ssh接続の有効化(公開鍵認証)
- 秘密鍵/公開鍵の作成(ed25519使用)
- サーバーへ公開鍵登録
- 接続確認
- config設定
- MariaDBインストール
- ログイン
- ユーザー一覧確認
- データベース一覧確認
- ユーザー登録&権限付与
- DBへの接続
- リモートアクセスの許可
- アクセス成功
- PyenvによるPython環境を構築する
- pyenv-installerを使用した環境構築方法
- Pythonをバージョン指定でインストールする
- pyenvのプロジェクトをgit cloneで取得して環境構築する方法
- バージョン確認
- pyenv-updateの取得と設定
- pyenv-virtualenvの取得と設定
- pyenv-doctorの取得と設定
- pyenv-ccacheの取得と設定
- Pythonをバージョン指定でインストールする
- Poetryのインストール
- curlコマンドによる取得
- コマンドの実行パス設定
- バージョン確認
- configファイル変更
- 【参考】Python(PyMySQL,Flask)とMariaDBを使用したデータの送受信処理例について
- まとめ
実行環境
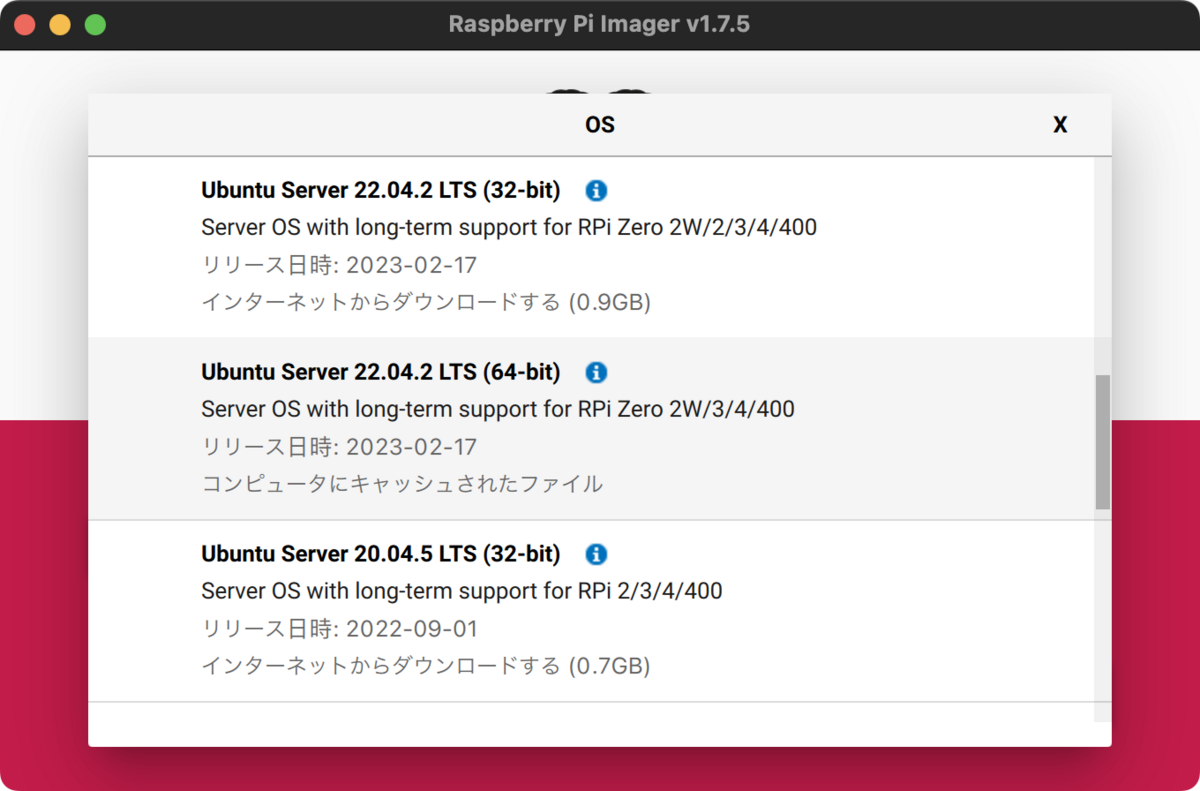
使用するRaspberry PiはRaspberry Pi 3 Model B+で、OSにはサポートするLTS版の最新1であるUbuntu Server 22.04.2 LTS (64-bit)を使用します。
OSイメージの書き込みから起動と設定
Raspberry Pi Imagerの使用
OSイメージの書き込みにはRaspberry Pi Imagerを使用します。
OSイメージ
補足
Raspberry Pi Imagerは公式サイトからDL可能
https://www.raspberrypi.com/software/
Macの場合はhomebrewからインストール可能
https://formulae.brew.sh/cask/raspberry-pi-imager
システム情報
$ uname -a
Linux ubuntu 5.15.0-1033-raspi #36-Ubuntu SMP PREEMPT Thu Jun 22 08:10:31 UTC 2023 aarch64 aarch64 aarch64 GNU/Linux

$ cat /etc/lsb-release
DISTRIB_ID=Ubuntu
DISTRIB_RELEASE=22.04
DISTRIB_CODENAME=jammy
DISTRIB_DESCRIPTION="Ubuntu 22.04.2 LTS"
パスワード変更
Raspberry Piにキーボードとディスプレイを接続して電源を入れます。
イメージが正常に起動し、ログインプロンプトが表示されたら、デフォルトのユーザー名 ubuntuとパスワード ubuntuを入力してログインします。
ログイン後はパスワード変更指示が出るので任意のパスワードに変更します。(変更するパスワードは2回入力します。)
current password: xxxxx
new pasword(だったはず): xxxxx
Wi-Fi設定
まず、cloud-initは使用しないため無効化します。
参考記事
ローカルインストール時もcloud-initを活用する
https://gihyo.jp/admin/serial/01/ubuntu-recipe/0561
【Ubuntu】 /etc/netplan/50-cloud-init.yamlを編集するの止めろ https://qiita.com/yas-nyan/items/9033fb1d1037dcf9dba5
Configuring networks
https://ubuntu.com/server/docs/network-configuration
/etc/cloud/cloud.cfg.d/99-disable-network-config.cfgを新規作成し、以下を記述します。
network: {config: disabled}
有線LANとWi-Fiによる無線LAN接続を有効にするため/etc/netplan/99-config.yamlを作成して以下を記述します。
network:
    version: 2
    renderer: networkd
    ethernets:
        eth0:
            dhcp4: true
            optional: true
    wifis:
        wlan0:
            dhcp4: true
            optional: true
            access-points:
                "[SSIDを入力]":
                    password: "[PASSWORDを入力]"
設定後は以下コマンドで設定を反映させ、Wi-Fi接続を有効にします。
ネットワーク設定が正常に適用されると、IPアドレスが正しく設定されます。(例: ip a)
$ sudo netplan apply
補足
dhcp4: trueを指定しないとipが設定されないので注意。optional: trueという設定は、ネットワークインターフェースが存在しない場合でもエラーを発生させないという意味。通常、Netplanは設定ファイルに記載されたすべてのネットワークインターフェースが存在することを期待する。しかし、"optional: true" を指定することで、設定されたインターフェースが見つからない場合でもエラーを回避することができる。
各種パッケージインストール
apt で各種パッケージを更新する。
$ sudo apt update
$ sudo apt upgrade
更新完了までは30分近く待ちました。更新後再起動します。
$ sudo shutdown -r now
raspi-configのインストール
手元のキーボードが意図した入力にならないため設定を変更します。
設定はdkpgコマンドでも可能ですが、今回はraspi-configを使用して変更します。
Rasbianではraspi-conifgを使用できますが、デフォルト状態のUbuntuでは raspi-config は提供されていないためインストールします。
$ sudo apt-get install raspi-config
キーボード設定
参考記事
RaspberryPiのキーボード入力の日本語化
https://qiita.com/sukinasaki/items/426068d6e87169fa3d88
Macネットワーク上でファイル共有する
sambaでも良いですが、Apple製品用のプロトコル(afp)を使用するnetatalkをインストールします。
参考記事
netatalkを使ってラズパイ-Mac間で簡単ファイル共有
https://ryjkmr.com/raspberry-pi-mac-netatalk-file-share/
$ sudp apt-get install netatalk
sudo nano /etc/netatlk/apt.confで設定ファイルを編集し、共有フォルダを設定します。
;
; Netatalk 3.x configuration file
;

[Global]
; Global server settings

; 以下のコメントアウトをはずして、regexを指定する。
[Homes]
basedir regex = /home

; [My AFP Volume]
; path = /path/to/volume

; [My Time Machine Volume]
; path = /path/to/backup
; time machine = yes
ssh接続の有効化(公開鍵認証)
参考記事
Macから公開鍵認証でSSHログインする [Ubuntu 22.04 LTS]
https://www.mulong.me/tech/linux/ubuntu-mac-ssh-login-public-key/
秘密鍵/公開鍵の作成(ed25519使用)
Mac(Zsh)で秘密鍵と公開鍵を作成します。 ※以下は一部環境変数に置き換えてます。
% ssh-keygen -t ed25519 -f ~/.ssh/id_ed25519_ubuntu
Generating public/private ed25519 key pair.
Enter passphrase (empty for no passphrase): [秘密鍵のパスフレーズを入力]
Enter same passphrase again:
Your identification has been saved in $HOME/.ssh/id_ed25519_ubuntu
Your public key has been saved in $HOME/.ssh/id_ed25519_ubuntu.pub
The key fingerprint is:
# 省略

% ls ~/.ssh/id_ed25519_ubuntu*
$HOME/.ssh/id_ed25519_ubuntu
$HOME/.ssh/id_ed25519_ubuntu.pub
サーバーへ公開鍵登録
ssh-copy-idコマンドでリモートホストに公開鍵を登録します。
$ ssh-copy-id .ssh/id_ed25519_ubuntu.pub user@host
接続確認
% ssh -i ~/.ssh/id_ed25519_ubuntu [user]@[host]
Enter passphrase for key '$HOME/.ssh/id_ed25519_ubuntu': [設定した秘密鍵のパスフレーズを入力]
Welcome to Ubuntu 22.04.2 LTS (GNU/Linux 5.15.0-1033-raspi aarch64)

 * Documentation:  https://help.ubuntu.com
 * Management:     https://landscape.canonical.com
 * Support:        https://ubuntu.com/advantage

  System information as of Sat Jul  1 11:58:34 JST 2023

  System load:            0.98095703125
  Usage of /:             11.6% of 28.13GB
  Memory usage:           27%
  Swap usage:             0%
  Temperature:            59.1 C
  Processes:              144
  Users logged in:        1
  IPv4 address for wlan0: 192.168.0.6
  IPv6 address for wlan0: 240f:111:8017:1:ba27:ebff:fe02:cf33

 * Strictly confined Kubernetes makes edge and IoT secure. Learn how MicroK8s
   just raised the bar for easy, resilient and secure K8s cluster deployment.

   https://ubuntu.com/engage/secure-kubernetes-at-the-edge

Expanded Security Maintenance for Applications is not enabled.

0 updates can be applied immediately.

Enable ESM Apps to receive additional future security updates.
See https://ubuntu.com/esm or run: sudo pro status


Last login: Sat Jul  1 11:48:53 2023
config設定
ssh コマンドでエイリアス名の接続ができるようにconfigファイルを変更します。
~/.ssh/configに以下を追加する
# RaspberryPi-ubuntu
Host brpi # エイリアス
  HostName [host]
  User [user]
  IdentityFile ~/.ssh/id_ed25519_ubuntu
  Port 22
  TCPKeepAlive yes
  IdentitiesOnly yes
MariaDBインストール
DBとしてMariaDBをインストールします。
インストール
ログの出力は割愛します。
$ sudo apt update
$ sudo apt install mariadb-server
バージョン
$ mysql --version
mysql  Ver 15.1 Distrib 10.6.12-MariaDB, for debian-linux-gnu (aarch64) using  EditLine wrapper
MariaDB サービスの確認
$ sudo systemctl status mariadb
● mariadb.service - MariaDB 10.6.12 database server
     Loaded: loaded (/lib/systemd/system/mariadb.service; enabled; vendor preset: enabled)
     Active: active (running) since Sat 2023-07-01 21:58:52 JST; 13h ago
       Docs: man:mariadbd(8)
             https://mariadb.com/kb/en/library/systemd/
    Process: 760 ExecStartPre=/usr/bin/install -m 755 -o mysql -g root -d /var/run/mysqld (code=exited, status=0/SUCCESS)
    Process: 774 ExecStartPre=/bin/sh -c systemctl unset-environment _WSREP_START_POSITION (code=exited, status=0/SUCCESS)
    Process: 777 ExecStartPre=/bin/sh -c [ ! -e /usr/bin/galera_recovery ] && VAR= ||   VAR=`cd /usr/bin/..; /usr/bin/galera_recovery`; [ $? -eq 0 ]   && systemctl set-environment _WSREP_START_POSITION>
    Process: 870 ExecStartPost=/bin/sh -c systemctl unset-environment _WSREP_START_POSITION (code=exited, status=0/SUCCESS)
    Process: 872 ExecStartPost=/etc/mysql/debian-start (code=exited, status=0/SUCCESS)
   Main PID: 825 (mariadbd)
     Status: "Taking your SQL requests now..."
      Tasks: 7 (limit: 954)
     Memory: 90.0M
        CPU: 2.773s
     CGroup: /system.slice/mariadb.service
             └─825 /usr/sbin/mariadbd

Jul 01 21:58:51 ubuntu mariadbd[825]: 2023-07-01 21:58:51 0 [Note] Server socket created on IP: '127.0.0.1'.
Jul 01 21:58:52 ubuntu mariadbd[825]: 2023-07-01 21:58:52 0 [Note] /usr/sbin/mariadbd: ready for connections.
Jul 01 21:58:52 ubuntu mariadbd[825]: Version: '10.6.12-MariaDB-0ubuntu0.22.04.1'  socket: '/run/mysqld/mysqld.sock'  port: 3306  Ubuntu 22.04
Jul 01 21:58:52 ubuntu systemd[1]: Started MariaDB 10.6.12 database server.
Jul 01 21:58:52 ubuntu /etc/mysql/debian-start[877]: Looking for 'mariadb' as: /usr/bin/mariadb
Jul 01 21:58:52 ubuntu /etc/mysql/debian-start[877]: Looking for 'mariadb-check' as: /usr/bin/mariadb-check
Jul 01 21:58:52 ubuntu /etc/mysql/debian-start[877]: This installation of MariaDB is already upgraded to 10.6.12-MariaDB.
Jul 01 21:58:52 ubuntu /etc/mysql/debian-start[877]: There is no need to run mysql_upgrade again for 10.6.12-MariaDB.
Jul 01 21:58:52 ubuntu /etc/mysql/debian-start[877]: You can use --force if you still want to run mysql_upgrade
Jul 01 21:58:52 ubuntu /etc/mysql/debian-start[889]: Triggering myisam-recover for all MyISAM tables and aria-recover for all Aria tables
セキュリティ設定
参考記事
以下記事はUbuntuとは異なりますが、設定内容ついて説明がわかりやすく記載されていますので参考にさせていただきました。
HomebrewでMacにMariaDBをインストールする手順と設定
https://oopsoop.com/steps-and-settings-to-install-mariadb-on-mac/
$ sudo mysql_secure_installation

NOTE: RUNNING ALL PARTS OF THIS SCRIPT IS RECOMMENDED FOR ALL MariaDB
      SERVERS IN PRODUCTION USE!  PLEASE READ EACH STEP CAREFULLY!

In order to log into MariaDB to secure it, we'll need the current
password for the root user. If you've just installed MariaDB, and
haven't set the root password yet, you should just press enter here.

Enter current password for root (enter for none): [そのままEnter]
OK, successfully used password, moving on...

Setting the root password or using the unix_socket ensures that nobody
can log into the MariaDB root user without the proper authorisation.

You already have your root account protected, so you can safely answer 'n'.

Switch to unix_socket authentication [Y/n] n
 ... skipping.

You already have your root account protected, so you can safely answer 'n'.

Change the root password? [Y/n] Y
New password: [パスワード入力]
Re-enter new password: [パスワード入力]
Password updated successfully!
Reloading privilege tables..
 ... Success!


By default, a MariaDB installation has an anonymous user, allowing anyone
to log into MariaDB without having to have a user account created for
them.  This is intended only for testing, and to make the installation
go a bit smoother.  You should remove them before moving into a
production environment.

Remove anonymous users? [Y/n] Y
 ... Success!

Normally, root should only be allowed to connect from 'localhost'.  This
ensures that someone cannot guess at the root password from the network.

Disallow root login remotely? [Y/n] Y
 ... Success!

By default, MariaDB comes with a database named 'test' that anyone can
access.  This is also intended only for testing, and should be removed
before moving into a production environment.

Remove test database and access to it? [Y/n] Y
 - Dropping test database...
 ... Success!
 - Removing privileges on test database...
 ... Success!

Reloading the privilege tables will ensure that all changes made so far
will take effect immediately.

Reload privilege tables now? [Y/n] Y
 ... Success!

Cleaning up...

All done!  If you've completed all of the above steps, your MariaDB
installation should now be secure.

Thanks for using MariaDB!
ログイン
$ sudo mysql -u root -p
Enter password: [Change the root password?で設定したパスワードを入力]
Welcome to the MariaDB monitor.  Commands end with ; or \g.
Your MariaDB connection id is 34
Server version: 10.6.12-MariaDB-0ubuntu0.22.04.1 Ubuntu 22.04

Copyright (c) 2000, 2018, Oracle, MariaDB Corporation Ab and others.

Type 'help;' or '\h' for help. Type '\c' to clear the current input statement.
ユーザー一覧確認
以下のコマンドで、Host,User,Passwordを確認できます。
MariaDB [(none)]> select host,user,password from mysql.user;
データベース一覧確認
MariaDB [(none)]> show databases;
+--------------------+
| Database           |
+--------------------+
| information_schema |
| mysql              |
| performance_schema |
| sys                |
+--------------------+
4 rows in set (0.007 sec)
ユーザー登録&権限付与
Note:
以下はテストデータです。 パスワードはセキュリティに配慮して設定してください。
以下のSQLコマンドで権限とパスワードを設定します。
ここではUserをtestuser1、Hostをパーセント(%) として、接続元のIPアドレスが変わる場合も接続できるようにします。
MariaDB [(none)]> GRANT ALL ON *.* TO 'testuser1'@'%' IDENTIFIED BY 'hogehoge';
Query OK, 0 rows affected (0.009 sec)

MariaDB [(none)]> select host,user from mysql.user;
+-----------+-------------+
| Host      | User        |
+-----------+-------------+
| %         | testuser1   |
| localhost | mariadb.sys |
| localhost | mysql       |
| localhost | root        |
+-----------+-------------+
4 rows in set (0.007 sec)
DBへの接続
Macからのログインを試みましたが2002エラーとなりました。原因を調べます。
% mysql -h [RaspberryPiのIPアドレス(例: 192.168.0.6)] -u [ユーザー名(例: testuser1)] -p
Enter password: [設定したパスワード]
ERROR 2002 (HY000): Can't connect to server on '192.168.0.6' (36)
nmapコマンドによるサービス確認
まず、nmapコマンドからPORT STATE SERVICEより、
22/tcp open sshからポート番号22のTCPポートが開いており、SSH(Secure Shell)サービスが実行されている548/tcp open afpからポート番号548のTCPポートが開いており、AFP(Apple Filing Protocol)サービスが実行されている
ことを示しています。
この結果から、192.168.0.6のホストにはSSHとAFPという2つのサービスが実行されており、ポート22とポート548がそれぞれ開いていることがわかります。
% nmap [RaspberryPiのIPアドレス]
Starting Nmap 7.94 ( https://nmap.org ) at 2023-07-02 13:15 JST
Nmap scan report for 192.168.0.6
Host is up (0.0052s latency).
Not shown: 998 closed tcp ports (conn-refused)
PORT    STATE SERVICE
22/tcp  open  ssh
548/tcp open  afp

Nmap done: 1 IP address (1 host up) scanned in 1.33 seconds
MariaDB用のポート3006は有効ではないため、MariaDBの設定ファイルを変更してリモートアクセスを許可します。
リモートアクセスの許可
参考記事
Raspberry Pi にデータベースを構築する【MySQL,MariaDB】 / リモートアクセスの許可
https://nort-wmli.blogspot.com/2019/06/raspberry-pi-mysqlmariadb.html?m=1
$ sudo grep bind-address /etc/ -r -n --color
/etc/mysql/mariadb.conf.d/50-server.cnf:27:bind-address            = 127.0.0.1
/etc/mysql/mariadb.conf.d/60-galera.cnf:17:#bind-address = 0.0.0.0
sudo vi /etc/mysql/mariadb.conf.d/50-server.cnf
# Instead of skip-networking the default is now to listen only on
# localhost which is more compatible and is not less secure.
bind-address            = 127.0.0.1 #変更前
#bind-address            = 127.0.0.1 #変更後
設定後は以下コマンドでmariadbを再起動します。
sudo systemctl restart mariadb
その後、再度nmapコマンドを実行するとmysqlがサービス登録されていることが確認できます。
% nmap [RaspberryPiのIPアドレス]
Starting Nmap 7.94 ( https://nmap.org ) at 2023-07-02 13:44 JST
Nmap scan report for 192.168.0.6
Host is up (0.0048s latency).
Not shown: 997 closed tcp ports (conn-refused)
PORT     STATE SERVICE
22/tcp   open  ssh
548/tcp  open  afp
3306/tcp open  mysql
補足
MariaDBや他のネットワークサービスでは、特定のIPアドレスとポート番号にソケットをバインドすることで、そのサービスがそのアドレスとポートでリクエストを受け付け、応答を返すことができるようになります。バインドされたアドレスとポートに到着するネットワークパケットは、バインドされたソケットに関連付けられたアプリケーションに渡されます。
MariaDB(およびMySQL)サーバーではリッスン(待ち受け)するネットワークインターフェースまたはIPアドレスを指定するための設定として、bind-addressが定義されています。
このbind-addressは一般的に、/etc/mysql/mariadb.conf.dに定義されています。(上記では念のためgrepで検索してます。)
通常、MariaDBはデフォルトでbind-addressを127.0.0.1(またはlocalhost)に設定しています。これは、MariaDBがローカルホスト上のみからの接続を受け入れるようにするためであり、MariaDBには他のネットワーク上のホストからのリモート接続が制限されています。
bind-addressをコメントアウトするか、0.0.0.0に設定2すると、MariaDBはすべてのネットワークインターフェース上のすべてのIPアドレスからの接続を受け入れるようになります。これにより、リモートホストからの接続が許可され、MariaDBサーバーへのリモートアクセスが可能になります。
アクセス成功
実行例
% mysql -h [RaspberryPiのIPアドレス(例: 192.168.0.6)] -u [ユーザー名(例: testuser1)] -p
Enter password:
Welcome to the MariaDB monitor.  Commands end with ; or \g.
Your MariaDB connection id is 31
Server version: 10.6.12-MariaDB-0ubuntu0.22.04.1 Ubuntu 22.04

Copyright (c) 2000, 2018, Oracle, MariaDB Corporation Ab and others.

Type 'help;' or '\h' for help. Type '\c' to clear the current input statement.
PyenvによるPython環境を構築する
次にPythonをインストールします。
Pythonのインストールにはpyenvを使用します。
構築方法として以下の方法を紹介します。
pyenv-installerを使用した環境構築方法
pyenvのプロジェクトをgit cloneで取得して環境構築する方法
参考記事
pyenv公式
https://github.com/pyenv/pyenv
Suggested build environment
https://github.com/pyenv/pyenv/wiki#suggested-build-environment
Plugins
https://github.com/pyenv/pyenv/wiki/Plugins
Ubuntuにpyenvをインストール
https://zenn.dev/hr0t15/articles/8ae3564bde2cce
pyenv-installerを使用した環境構築方法
pyenv-installerはpyenv-doctor,pyenv-virtualenv等のpyenv環境一式をインストールするrunファイルが含まれています。詳細はプロジェクトのリンク(automatic-installer)を確認してください。
パッケージのインストール
Suggested build environment / Ubuntu/Debian/Mint:に記載されている通り、事前にコンパイル、およびビルド環境を構築する必要があります。
pyenv will try its best to download and compile the wanted Python version, but sometimes compilation fails because of unmet system dependencies, or compilation succeeds but the new Python version exhibits weird failures at runtime. The following instructions are our recommendations for a sane build environment.
以下コマンドで必要なパッケージをインストールします。
※ログの記載は割愛します。
sudo apt update; sudo apt install build-essential libssl-dev zlib1g-dev \
libbz2-dev libreadline-dev libsqlite3-dev curl \
libncursesw5-dev xz-utils tk-dev libxml2-dev libxmlsec1-dev libffi-dev liblzma-dev
runファイル実行
runファイルを使用することでpyenvと関連するプラグインを連続してインストールすることができます。
curl https://pyenv.run | bash
  % Total    % Received % Xferd  Average Speed   Time    Time     Time  Current
                                 Dload  Upload   Total   Spent    Left  Speed
100   270  100   270    0     0    156      0  0:00:01  0:00:01 --:--:--   156
Cloning into '$HOME/.pyenv'...
remote: Enumerating objects: 1138, done.
remote: Counting objects: 100% (1138/1138), done.
remote: Compressing objects: 100% (683/683), done.
remote: Total 1138 (delta 642), reused 611 (delta 322), pack-reused 0
Receiving objects: 100% (1138/1138), 570.06 KiB | 3.37 MiB/s, done.
Resolving deltas: 100% (642/642), done.
Cloning into '$HOME/.pyenv/plugins/pyenv-doctor'...
remote: Enumerating objects: 11, done.
remote: Counting objects: 100% (11/11), done.
remote: Compressing objects: 100% (9/9), done.
remote: Total 11 (delta 1), reused 5 (delta 0), pack-reused 0
Receiving objects: 100% (11/11), 38.72 KiB | 2.15 MiB/s, done.
Resolving deltas: 100% (1/1), done.
Cloning into '$HOME/.pyenv/plugins/pyenv-update'...
remote: Enumerating objects: 10, done.
remote: Counting objects: 100% (10/10), done.
remote: Compressing objects: 100% (6/6), done.
remote: Total 10 (delta 1), reused 5 (delta 0), pack-reused 0
Receiving objects: 100% (10/10), done.
Resolving deltas: 100% (1/1), done.
Cloning into '$HOME/.pyenv/plugins/pyenv-virtualenv'...
remote: Enumerating objects: 63, done.
remote: Counting objects: 100% (63/63), done.
remote: Compressing objects: 100% (56/56), done.
remote: Total 63 (delta 11), reused 28 (delta 0), pack-reused 0
Receiving objects: 100% (63/63), 40.22 KiB | 1.26 MiB/s, done.
Resolving deltas: 100% (11/11), done.

WARNING: seems you still have not added 'pyenv' to the load path.

# Load pyenv automatically by appending
# the following to
~/.bash_profile if it exists, otherwise ~/.profile (for login shells)
and ~/.bashrc (for interactive shells) :

export PYENV_ROOT="$HOME/.pyenv"
command -v pyenv >/dev/null || export PATH="$PYENV_ROOT/bin:$PATH"
eval "$(pyenv init -)"

# Restart your shell for the changes to take effect.

# Load pyenv-virtualenv automatically by adding
# the following to ~/.bashrc:

eval "$(pyenv virtualenv-init -)"
curlコマンド実行後はpyenvのパス設定を行う必要があるため下記を実行します。
なお、pyenv-ccacheは含まれないため必要であれば追加インストールが必要です。
echo '# pyenv' >> ~/.bashrc
echo 'export PYENV_ROOT="$HOME/.pyenv"' >> ~/.bashrc
echo 'command -v pyenv >/dev/null || export PATH="$PYENV_ROOT/bin:$PATH"' >> ~/.bashrc
echo 'eval "$(pyenv init -)"' >> ~/.bashrc
echo 'eval "$(pyenv virtualenv-init -)"' >> ~/.bashrc
echo 'alias pyenv_il="pyenv install --list"' >> ~/.bashrc
echo 'function pyenv_ill { n=${1:-1}; pyenv install --list | grep -E "^  3\.[0-9]+\.[0-9]+$" | sort -V | tail -n ${n}; }' >> ~/.bashrc
echo 'alias pyenv_ill=pyenv_ill' >> ~/.bashrc
設定後、シェルを再起動します。
exec "$SHELL"
補足
pyenvコマンドのエイリアスについて
上記echoコマンドではpyenvコマンドのエイリアスも追加しています。
echo 'alias pyenv_il="pyenv install --list"' >> ~/.bashrc echo 'function pyenv_ill { n=${1:-1}; pyenv install --list | grep -E "^ 3.[0-9]+.[0-9]+$" | sort -V | tail -n ${n}; }' >> ~/.bashrc echo 'alias pyenv_ill=pyenv_ill' >> ~/.bashrc
これはインストール可能なPythonバージョンはpyenv install --listコマンドで一覧表示できますが、大抵は直近数件のx.x.xバージョンのみ表示できれば十分であるため、個人用に関数を作成してエイリアスに登録します。
$ pyenv_il
Available versions:
  2.1.3
  2.2.3
  2.3.7
 …
  stackless-3.3.7
  stackless-3.4-dev
  stackless-3.4.2
  stackless-3.4.7
  stackless-3.5.4
  stackless-3.7.5

$ pyenv_ill
  3.11.4 # 引数指定しない場合は直近のバージョンのみ表示します。

$ pyenv_ill 5
  3.11.0 # 引数指定する場合は直近のバージョンから指定した数分のバージョンを表示します。
  3.11.1
  3.11.2
  3.11.3
  3.11.4
Pythonをバージョン指定でインストールする
インストールにはpyenv installコマンドを使用します。
コンパイルとビルドには1.5時間ほどかかりました。
※ログの記載は割愛します。
pyenv install 3.11.4
pyenvのプロジェクトをgit cloneで取得して環境構築する方法
basic-github-checkoutを参照して実行します。
git clone https://github.com/pyenv/pyenv.git ~/.pyenv
Pyenv の設定コマンドを.bashrcに追加する
参考記事
Set up your shell environment for Pyenv / For bash
echo '# pyenv' >> ~/.bashrc
echo 'export PYENV_ROOT="$HOME/.pyenv"' >> ~/.bashrc
echo 'command -v pyenv >/dev/null || export PATH="$PYENV_ROOT/bin:$PATH"' >> ~/.bashrc
echo 'eval "$(pyenv init -)"' >> ~/.bashrc
設定後、シェルを再起動します。
exec "$SHELL"
バージョン確認
$ pyenv --version
pyenv 2.3.21-2-ga2dff480
pyenv-updateの取得と設定
pyenv-updateはpyenvとそのプラグインを更新するpyenv updateコマンドを提供するpyenvプラグイン です。
$ git clone https://github.com/pyenv/pyenv-update.git $(pyenv root)/plugins/pyenv-update
Cloning into '$HOME/.pyenv/plugins/pyenv-update'...
remote: Enumerating objects: 81, done.
remote: Counting objects: 100% (22/22), done.
remote: Compressing objects: 100% (14/14), done.
remote: Total 81 (delta 8), reused 11 (delta 3), pack-reused 59
Receiving objects: 100% (81/81), 15.60 KiB | 499.00 KiB/s, done.
Resolving deltas: 100% (29/29), done.
実行確認
$ pyenv update
Updating $HOME/.pyenv...
From https://github.com/pyenv/pyenv
 * branch              master     -> FETCH_HEAD
Already up to date.
Updating $HOME/.pyenv/plugins/pyenv-update...
From https://github.com/pyenv/pyenv-update
 * branch            master     -> FETCH_HEAD
Already up to date.
pyenv-virtualenvの取得と設定
pyenv-virtualenvはUNIXライクなシステム上でPythonのvirtualenvsとconda環境を管理する機能を提供するプラグインです。
git clone https://github.com/pyenv/pyenv-virtualenv.git $(pyenv root)/plugins/pyenv-virtualenv
Cloning into '$HOME/.pyenv/plugins/pyenv-virtualenv'...
remote: Enumerating objects: 2248, done.
remote: Counting objects: 100% (177/177), done.
remote: Compressing objects: 100% (117/117), done.
remote: Total 2248 (delta 96), reused 113 (delta 53), pack-reused 2071
Receiving objects: 100% (2248/2248), 639.32 KiB | 3.85 MiB/s, done.
Resolving deltas: 100% (1516/1516), done.

echo 'eval "$(pyenv virtualenv-init -)"' >> ~/.bashrc
pyenvエイリアス設定
echo 'alias pyenv_il="pyenv install --list"' >> ~/.bashrc
echo 'function pyenv_ill { n=${1:-1}; pyenv install --list | grep -E "^  3\.[0-9]+\.[0-9]+$" | sort -V | tail -n ${n}; }' >> ~/.bashrc
echo 'alias pyenv_ill=pyenv_ill' >> ~/.bashrc
pyenv-doctorの取得と設定
pyenv-doctorはpyenvのインストールとpythonをビルドするための開発ツールを検証するpyenv doctorコマンドを提供するpyenvプラグインです。
git clone https://github.com/pyenv/pyenv-doctor.git ~/.pyenv/plugins/pyenv-doctor
Cloning into '$HOME/.pyenv/plugins/pyenv-doctor'...
remote: Enumerating objects: 65, done.
remote: Counting objects: 100% (18/18), done.
remote: Compressing objects: 100% (12/12), done.
remote: Total 65 (delta 5), reused 10 (delta 3), pack-reused 47
Receiving objects: 100% (65/65), 57.60 KiB | 412.00 KiB/s, done.
Resolving deltas: 100% (25/25), done.
pyenv doctor
Cloning $HOME/.pyenv/plugins/pyenv-doctor/bin/.....
Installing python-pyenv-doctor...
Installed python-pyenv-doctor to /tmp/pyenv-doctor.20230702155740.10576/prefix
Congratulations! You are ready to build pythons!
pyenv-ccacheの取得と設定
pyenv-ccacheはccacheでPython のビルドを高速化するプラグインです。
ccacheが必要なためインストールします。
sudo apt install ccache
git clone https://github.com/pyenv/pyenv-ccache.git $(pyenv root)/plugins/pyenv-ccache
Cloning into '$HOME/.pyenv/plugins/pyenv-ccache'...
remote: Enumerating objects: 47, done.
remote: Counting objects: 100% (9/9), done.
remote: Compressing objects: 100% (6/6), done.
remote: Total 47 (delta 1), reused 3 (delta 0), pack-reused 38
Receiving objects: 100% (47/47), 10.04 KiB | 934.00 KiB/s, done.
Resolving deltas: 100% (16/16), done.
Pythonをバージョン指定でインストールする
インストールにはpyenv installコマンドを使用します。
コンパイルとビルドには1.5時間ほどかかりました。
※ログの記載は割愛します。
pyenv install 3.11.4
Poetryのインストール
python向けのパッケージ管理ツールであるPoetryをインストールします。
公式手順を参考にインストールします。
参考
With the official installer / Linux, macOS, Windows (WSL)
https://python-poetry.org/docs/#installation
curlコマンドによる取得
$ curl -sSL https://install.python-poetry.org | python3 -
Retrieving Poetry metadata

# Welcome to Poetry!

This will download and install the latest version of Poetry,
a dependency and package manager for Python.

It will add the `poetry` command to Poetry's bin directory, located at:

$HOME/.local/bin

You can uninstall at any time by executing this script with the --uninstall option,
and these changes will be reverted.

Installing Poetry (1.5.1): Done

Poetry (1.5.1) is installed now. Great!

To get started you need Poetry's bin directory ($HOME/.local/bin) in your `PATH`
environment variable.

Add `export PATH="$HOME/.local/bin:$PATH"` to your shell configuration file.

Alternatively, you can call Poetry explicitly with `$HOME/.local/bin/poetry`.

You can test that everything is set up by executing:

`poetry --version`
コマンドの実行パス設定
echo '# poetry' >> ~/.bashrc
echo 'export PATH="$HOME/.local/bin:$PATH"' >> ~/.bashrc
exec "$SHELL"
バージョン確認
パスが設定されるとバージョンが表示されます。
$ poetry --version
Poetry (version 1.5.1)
configファイル変更
virtualenvs.in-projectの設定を変更して各プロジェクト配下に仮想環境を作るようにします。
これで仮想環境の実体が入ったフォルダ(python.exe, 各パッケージ)を、 各プロジェクト直下の .venv に作成されるようになります。
(参考: #using-your-virtual-environment)
$ poetry config virtualenvs.in-project true
$ poetry config --list
cache-dir = "$HOME/.cache/pypoetry"
experimental.system-git-client = false
installer.max-workers = null
installer.modern-installation = true
installer.no-binary = null
installer.parallel = true
virtualenvs.create = true
virtualenvs.in-project = true
virtualenvs.options.always-copy = false
virtualenvs.options.no-pip = false
virtualenvs.options.no-setuptools = false
virtualenvs.options.system-site-packages = false
virtualenvs.path = "{cache-dir}/virtualenvs"  # $HOME/.cache/pypoetry/virtualenvs
virtualenvs.prefer-active-python = false
virtualenvs.prompt = "{project_name}-py{python_version}"
【参考】Python(PyMySQL,Flask)とMariaDBを使用したデータの送受信処理例について
PythonでMySQLデータベースを操作する方法として、
以前、QiitaにSonyのMESH(温度・湿度タグ)から取得した温度情報をローカルWebサーバ経由(Flask)に対してPyMySQLを使用してMySQLデータベース(MariaDB)に追加する方法を投稿しました。
参考としてリンクを載せておきます。
まとめ
Raspberry Pi(Ubuntu)にMariaDBとPythonをインストールする手順について紹介しました。
本来はRaspberry Pi4とDesktop版のUbuntuを使用したかったのですが、手元になく、Server版でも困ることはなかったため本構成で環境構築しました。Desktop版でも基本的に同じように設定できるという認識です。
最後に、本記事がどなたかの参考になれば幸いです。
また、記事が参考になれば、是非「はてなスター」をお願いします。
以上です。